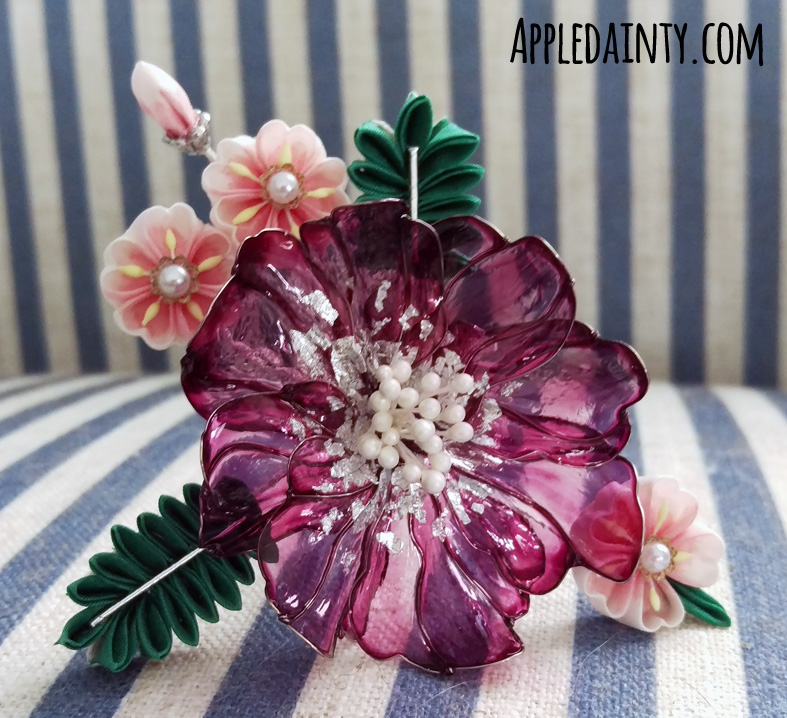
I’ve been fascinated with the idea of resin kanzashi since seeing Kanzashi by Sakae pop up on my facebook feed a couple years ago. But, finding the right kind of resin material has been a bit difficult, since they don’t actually manufacture it in my part of the world any more. If goes by many different names, but Dip It Fantasy Film is the brand that I used, and I purchased it from a fantastic shop called Clay Alley.
I have been planning to do some projects with the resin for some time, but I’ve not had a lot of success with resin in the past, so I’ve been hesitant. Then, my friend Jo and I decided to do an art trade, and it gave me the perfect excuse to try it out.
I spent several hours the first night I opened up the resin cans just doing test pieces.
The first thing you do to make these resin petals is create a wire frame. I made simple petal shapes from 28 gauge wire to test with; no veining or details. I like using this very fine, thin wire, but I’m not sure I’d recommend it to others. Wire this thin is very easy to break, and even though I have fairly good fine motor control and dexterity in my fingers, I stripped and broke a number of wires until I got used to it. I might go a little thicker to 26 gauge next time, or use larger wire for the outline and finer wire for the interior veins.
One thing I learned was that it’s a lot easier to create the outline and the interior veining wires as a flat piece, then add the bends and curves. This reduces the need to match the curves on the interior with the curves on the exterior by creating them at the same time, using the same curved tool. To make my curves I use whatever round items are handy and can give roughly the curve I need – spoons, bottles, paint brush ends, etc.
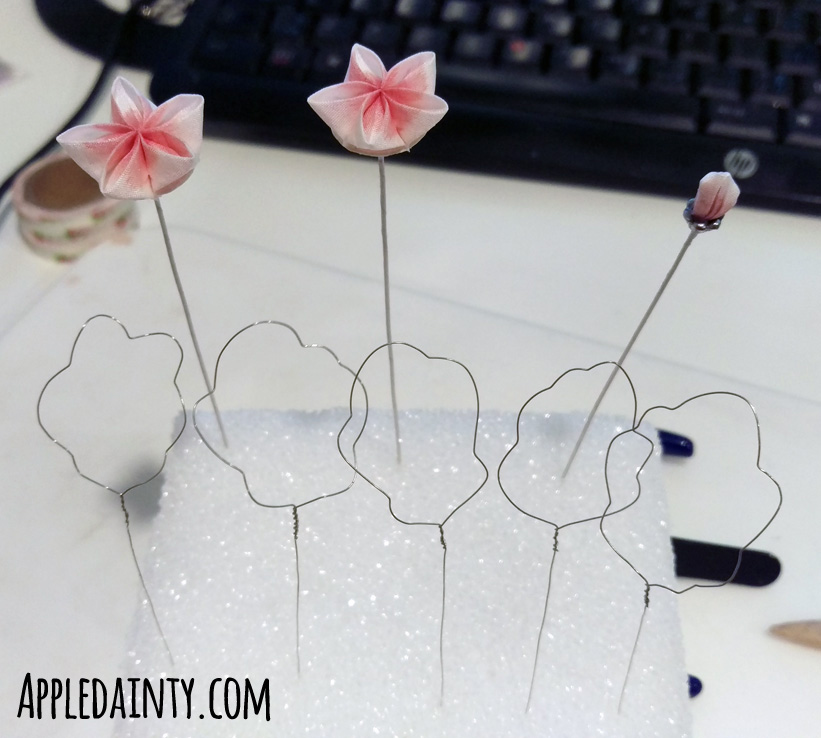
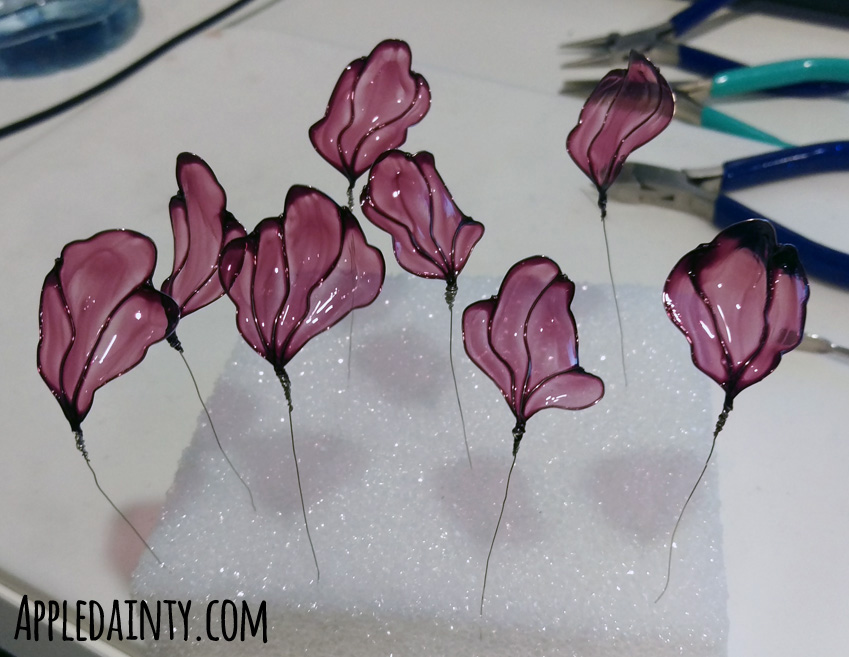
Once you’ve got your wire frames together, the next step is to dip the wire frame into the resin. I would double check that you have your wire frames exactly how you want them because you can’t bend them once the resin is applied; that will stretch, crease, and basically ruin the resin.
It sounds easy enough, but it’s actually a little difficult hard. It took me a few hours to really get the hang of it. You’re trying to create as smooth a finish as possible, with little or no bubbles. The resin will start to dry or harden if you leave the lid off too long, so that means you want to gently stir the resin every so often – which often means you end up with some bubbles in the resin.
The good news is you can kind of aim around the bubbles or get them near the end of the wire frame so they are pulled off with the rest of the excess resin and don’t end up in your finished petal. The instructions say to dip the frame in, and slowly pull the frame out vertically. The key here is really that – to keep the frame vertical as you slowly lift it out of the resin. It should create a ‘bubble’ of resin within the frame, but unlike soap and water bubbles this one won’t dissipate.
If you let the bubble form slowly and pull the frame up as vertically as possible, it should leave very little excess resin. If you do have a string of excess resin, you can gently wipe the frame on the side of the can to remove it. You just want to be careful so as not to pop or deform the bubble, which is very delicate. Once dried it will create a plastic film.
The film isn’t as delicate as you might think, but you definitely don’t want to touch it because that will leave fingerprints, and probably crease your petal.
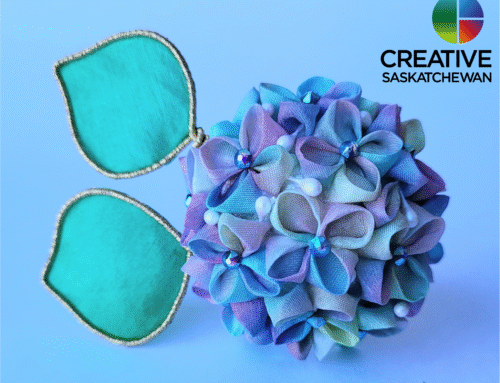
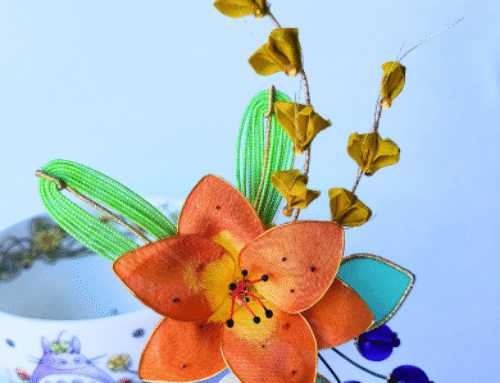
Once the petals are completely cured, you can paint or decorate them, then coat them in strengthener (clear varnish) to protect them. For this project, I did two coats of strengthener, then added silver gilding leaf to the middle parts of the petals, where they join together. After the gilding dried, I did two more coats of strengthener to seal the silver leaf in place.
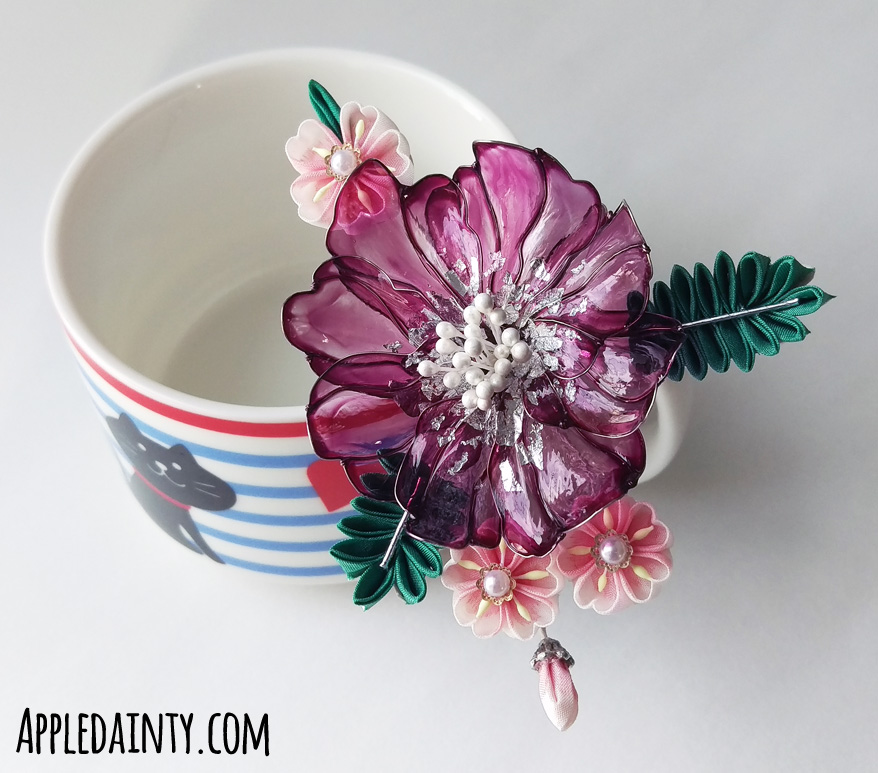
I think going forward, I want to use the colored resin sparingly, and work mostly in clear resin. The swirls of color that you get from the tinted resin has a nice, organic feel. But, I feel that clear resin paired with an airbrush and translucent paint will give me finer control over the color combinations and effects that I can achieve.
The last thing I want to mention about fantasy film is that if it goes wrong, you can use thinner not just to revive your old resin, but to clean off your wire. You might have to reshape the wire, but at least you won’t have to start all over again and waste a lot of material trying to get it right.
I still have a lot left to learn, but I’m really excited with the success I’ve found so far using this new material. I’m looking forward to continuing my exploration of new materials combined with traditional techniques.
Anyhoo, that is about all I’ve got for this week. None of the links above are affiliate links, so I won’t get anything from them if you click on them. However, if you like this blog and want to help support it, consider buying me a coffee. Your support is greatly appreciated, and I hope that you check back again next week for more art, crafts, and creativity!


I would really like so much to leatn about maling these kanzashi!! I am wondering also how to join the petals & how to make one into a brooch. And the veining — are they little pieces of wire actually welded in place or what?? i did some electronics welding yrs ago, sm components, and a not too heavy soldering iron is a must. Sorry fot typos — using my phone & is a nightmare to type one fingered on here!!
I didn’t solder the wire together, I just wrapped the ends around tight. 🙂 But some people do solder them. I probably should since I have a soldering iron!