The last six months or so, I’ve been plugging away at renovating and furnishing our house. You would think that in that time I would have gotten a lot more completely finished, especially during the months when we were still living with my in-laws. But, it seems like only recently we’ve really put the finishing touches on most of these projects.
One of the very first projects I started was my kitchen island. I knew I wanted to repaint our old cabinets, and thought I would start with the island since it was self contained. I also decided to add some of the 3d paintable wallpaper to the kitchen backsplash to the back of the island, and paint it to match the light fixtures I’d refinished previously.
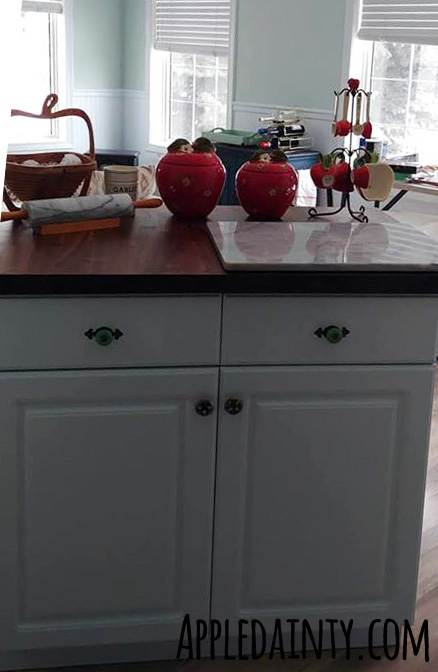
I started with a rustoleum cabinet transformations kit, so I could turn my yellowy-white island and cabinets to a more blue-white color. The instructions were pretty easy, and the painting itself went relatively smoothly until it came time to do the sealer.
My can of sealer had been contaminated with some kind of black speckles or dust. Rustoleum was kind enough to refund the cost of my kit, but there were a lot of tears around having to strip the fresh paint off parts of the cabinet frame and redo it. I ended up buying a can of Benjamin Moore Stays Clear in semi-gloss finish instead, which has served me really well.
Other than the mishap with the sealer, which I am sure is a fluke, the only negative about this cabinet painting kit is that you actually need closer to 3-4 coats of paint, as opposed to two coats of paint, to get good even coverage. I fully intend on using the paint that came with the kit for the rest of my cabinets, and buying another can of Stays Clear as the sealer as I’m now almost out.
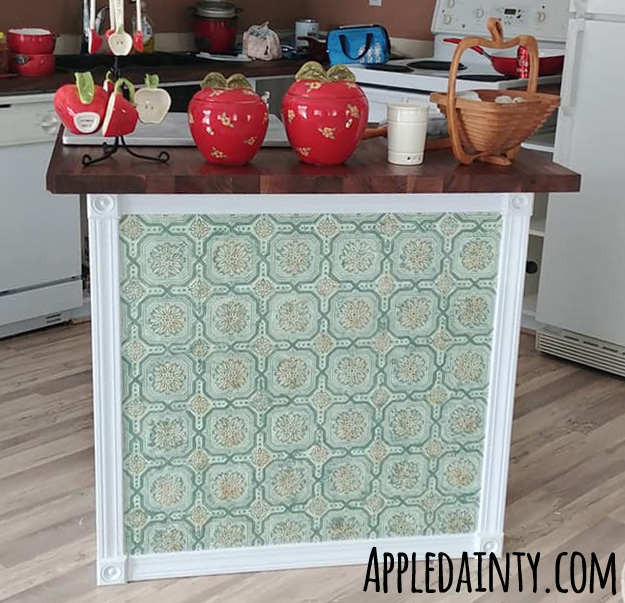
This island was my very first time using wallpaper. I would love to say it went swimmingly, but the truth is I tried to use the water activated paste that came on the back of the roll, painted it all up, and a few weeks later it bubbled and peeled right off.
By this point I’d already suffered through having to redo parts of the island painting, and having to repaint a coat of paint on the entire main floor due to a can of paint not being mixed properly by the paint store, leaving me with erratically darker or lighter stripes of the green I was supposed to have on the walls. So, instead of having a mental breakdown, I just groaned a bit and got on with it. Finding out that the water activated paste wasn’t strong enough saved me from trying to use it on my walls. In a way, it was worth having to redo the bit on the island if that meant I didn’t have to redo all of my living room walls.
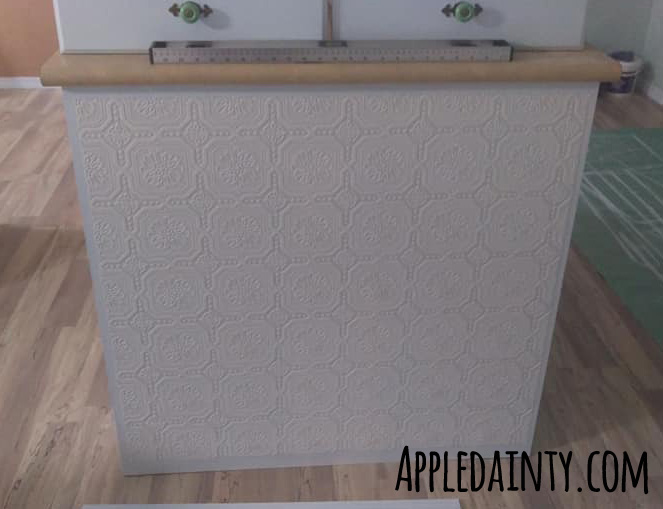
After stripping the original wallpaper I gave the back of the island a coat of Zissner BIN primer, giving the wallpaper an easier surface to adhere to, before proceeding to brush on my wallpaper paste. Applying the wallpaper the second time actually went a lot better, since I’d started on my walls and had gotten some practice in by this point. I’d also done my paint application once before, so I feel like the paint came out a lot sharper the second time around.
My husband was kind enough to cut the trim pieces for me, which I painted and adhered to the island with no-nail glue. To give the trim a really finished look, I caulked around the outside and inside edges of trim.
What probably took the longest was the new counter tops. I wanted those to go in before I installed the trim, to make sure everything fit together well. We’d originally planned on doing it ourselves, but it kept getting pushed back – which meant I was stuck. We finally hired someone to install the counters for us, and I could move on with doing the trim.
While waiting on the counter tops, we changed out the old hardware for cute ceramic and brass pieces, and applied floral contact paper to the sides of the drawers, and the interior back panel of the cabinet. The bolts that came with our new drawer pulls were too short to work on the drawers, but my mother in law was kind enough to acquire the right size and length ones for us from The Bolt Supply House, our local bolt superstore. Since we only needed a couple, they gave them to her as samples – crisis averted, and we didn’t even have to spend money. I’m not getting anything from putting that link there, I just wanted to say thanks Bolt Supply House! We appreciate your wonderful customer service.
Other than the issue of short bolts, the ceramic pulls were more green than the blue-green pictured in the Amazon listing, but I still think they look really good.
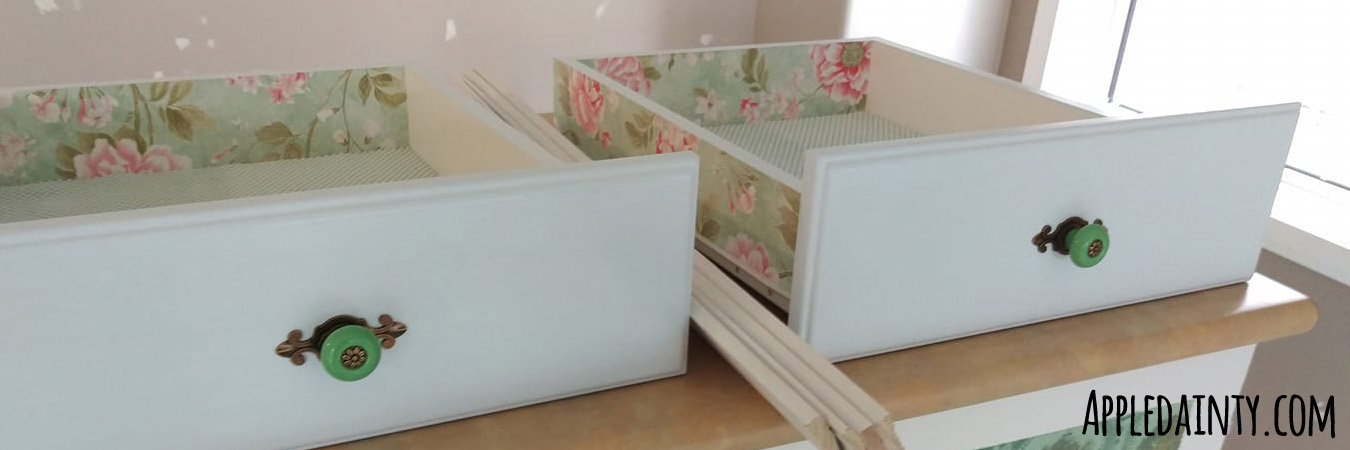
As for the contact paper, I think it’s kind of unexpected, and it makes me smile every time I open the drawers. I’m going to be doing the same contact paper in the rest of my cabinets, but I don’t think I’ll be applying it to the back panel of my last drawer; most people don’t pull the drawer our far enough to see it, and once you put stuff in the drawers that blocks it out completely.
Speaking of putting things in drawers, I knew that with a small kitchen and limited counter and cabinet space I would need to be creative with organizational features. After spending a lot of time googling DIY blogs and tutorials, browsing pinterest, and fussing around on the ikea website, I landed on using partitions for my flat pans, an adjustable sliding rack for my pots/sauce pans, and a couple of bars for hanging pot lids. I also put a command hook on the back of one of my island doors for my cutting board.
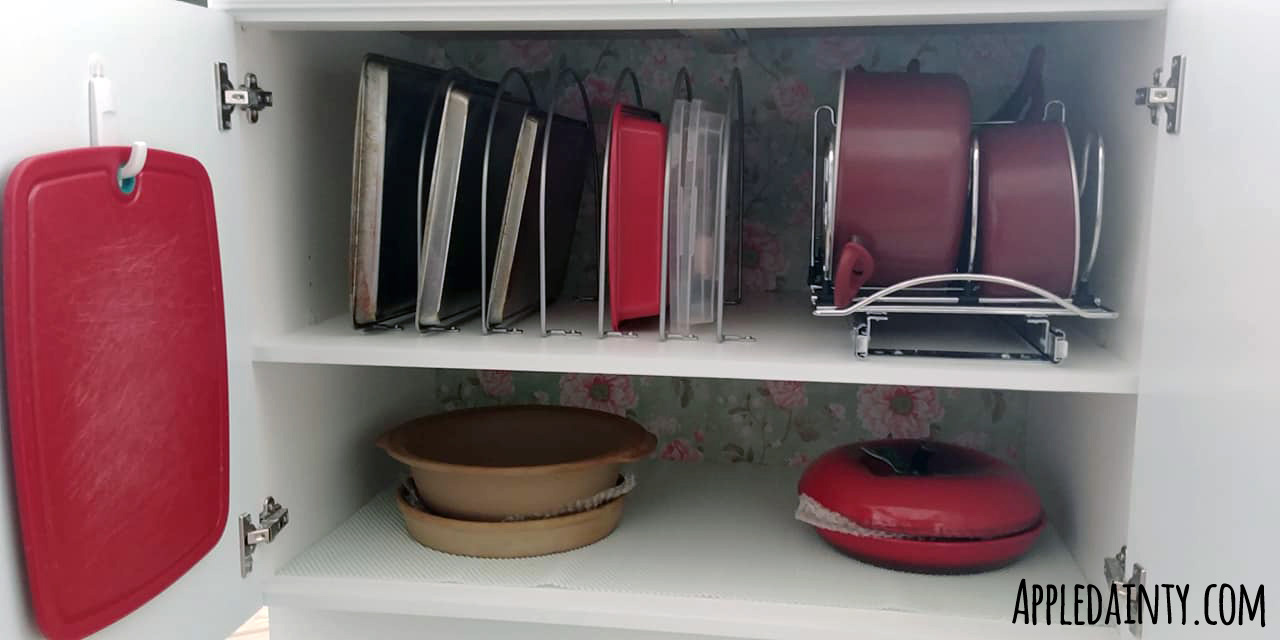
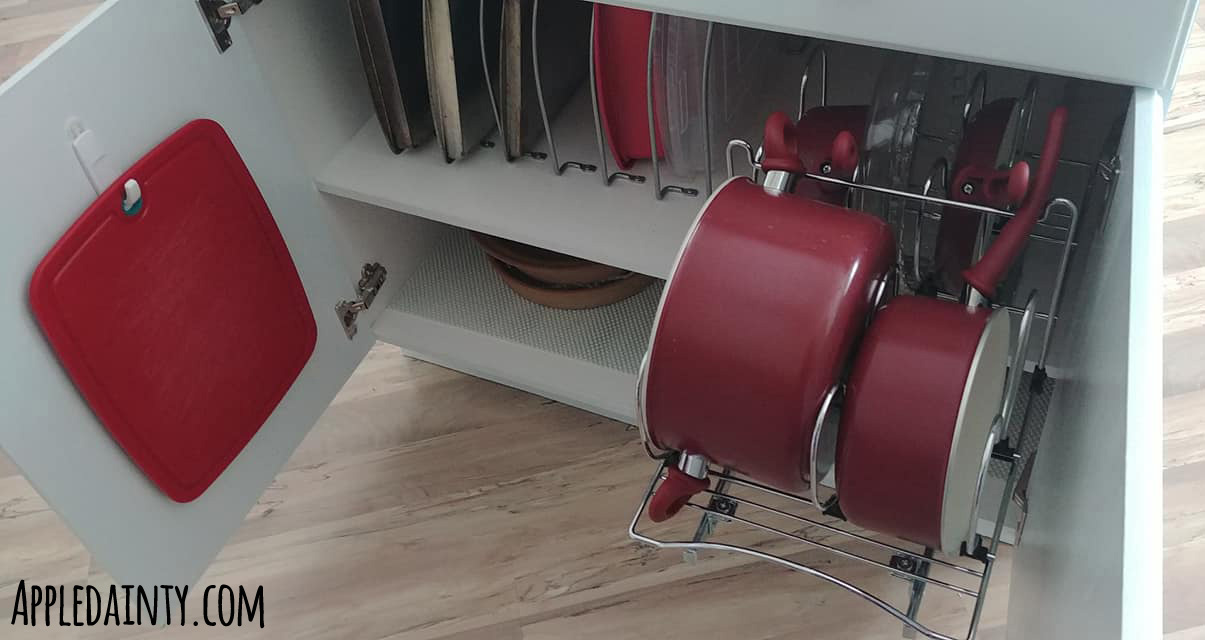
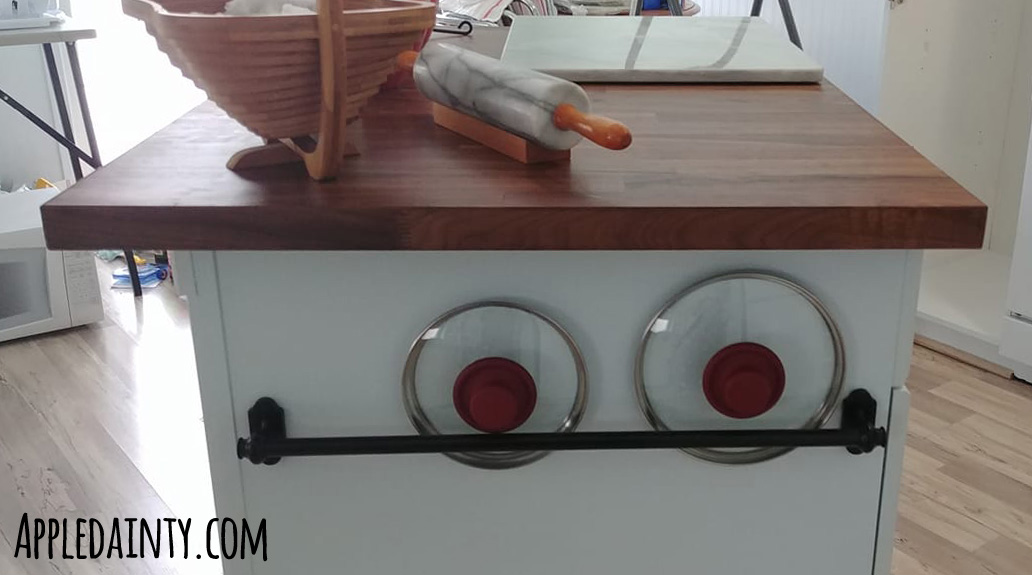
In the end we only installed one bar for the lids. Not because we don’t have more lids, but because after looking at it and trying it for a few days, we decided it wasn’t a good spot for them. So, we’re going to get another slider for the lids to go inside one of our other cabinets, and use the bars for kitchen towels. We’re going to install the second bar later, above the first one, once we’ve got the lids situated into their new sliding home.
We have a lot of kitchen towels, so instead of having them take up valuable cabinet space or be kept upstairs in the linen closet, which is not very convenient, we’ll just keep them on the bars. Plus, that gives me a reason to make extra cute towels once our current batch start wearing out and become cleaning rags.
If you’re interested in any of the items I’ve used for our kitchen island reno, here is a convenient list:
- Rustoleum Cabinet Transformation Kit in Frost (Home Depot)
- Graham & Brown 3D Paintable Wallpaper (Home Depot)
- Vintage Floral Contact Paper (Amazon)
- Con-Tact Brand Grip Liner in Watery (Amazon)
- Green Ceramic Cabinet Knobs with Brass Backings (Amazon)
- Utrusta Partitions (Ikea)
- Fintorp 57cm Rail (Ikea)
- Karlby Countertop for Island (Ikea)
- Lynk Professional Roll-Out Steel Cookware Organizer (Bed, Bath & Beyond)
Anyhoo, that is about all I’ve got for this week. None of the links above are affiliate links, so I won’t get anything from them if you click on them. However, if you like this blog and want to help support it, consider buying me a coffee. Your support is greatly appreciated, and I hope that you check back again next week for more art, crafts, and creativity!
