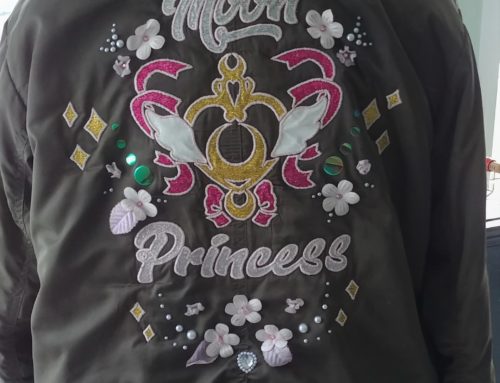
I’ve always got a lot of projects on the go at the same time, but I find that doing too many long, difficult projects at once can be draining. So, this weekend I took some time out to do a short project – a Sailor Moon t-shirt.
A few years ago my husband bought me a Silhouette Curio for Christmas. I’ve used it for loads of projects, but it’s been a while since I’ve fired it up. I was really pleased to get the chance to work with my cutting machine again, though I found that the recommended settings didn’t work.
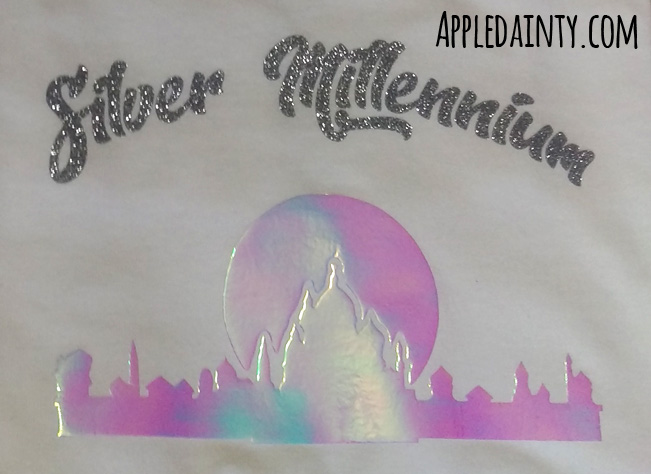
The first thing I did when I started planning this t-shirt, was to create an outline of the ruins of the silver millennium – ruins that the Sailor Scouts visited during the course of the series, and where they found a recorded image of Queen Serenity. I traced over an screenshot of the ruins taken from the show with a lightbox, then inked and scanned my outline After that, I filled the outline with black in photoshop, added some lettering, and imported it to Silhouette Studio to set up for cutting.
I used the autotrace feature to make the cutting outline, which is quick and easy, but the real trick was figuring out what print setting worked best. I used a regular cutting blade set to an 8, with double cut checked. This worked a lot better for me than the recommended vinyl cutting settings. When I my first cut attempt, I made the mistake of cutting the text un-flipped (not mirrored) the first time; it needs to be mirrored since the vinyl is cut on the vinyl-side as opposed to the transfer-plastic side.
I used a regular iron on high heat to do the transfer; I’m not sure if you’re supposed to use that high of heat, but I found that it worked better than medium heat. I also used a thin piece of cloth in between the plastic transfer sheet and the iron.
I did several passes with the iron, starting out by holding the iron over each section of the transfer for ten seconds, without putting pressure on the iron (which can leave indents in the design). Next, I did a smooth (no pausing) pass on the front side. After that I removed the cloth and did a couple short, smooth passes over the bare transfer plastic. When I was pretty sure the vinyl had stuck, I lifted a corner of the transfer plastic to check, then pulled it the rest of the way off. Last, I turned the shirt inside out and ironed on the back side of the design just to be sure the glue had completely adhered.
The holographic vinyl was tricky; it had a harder time adhering to the fabric than the glitter vinyl, and the transfer plastic for the holo vinyl was not nearly as tacky as that of the glitter vinyl. I did quite a few extra passes over the holographic vinyl on my second shirt, because the first one made me a bit paranoid. I had to lift the holo vinyl up and re-adhere it twice because it buckled. It made me consider buying a shirt press; which I would be far more likely to do if I actually intended on making lots of shirts. Since I’m not, a regular iron is fine.
I positioned the vinyl on the white t-shirt just a tad low, but had better placement on the grey one. I think I might give it another shot, and do a giveaway with the extra shirts. Probably won’t do a grey one again, since the silver glitter text is a bit hard to see.
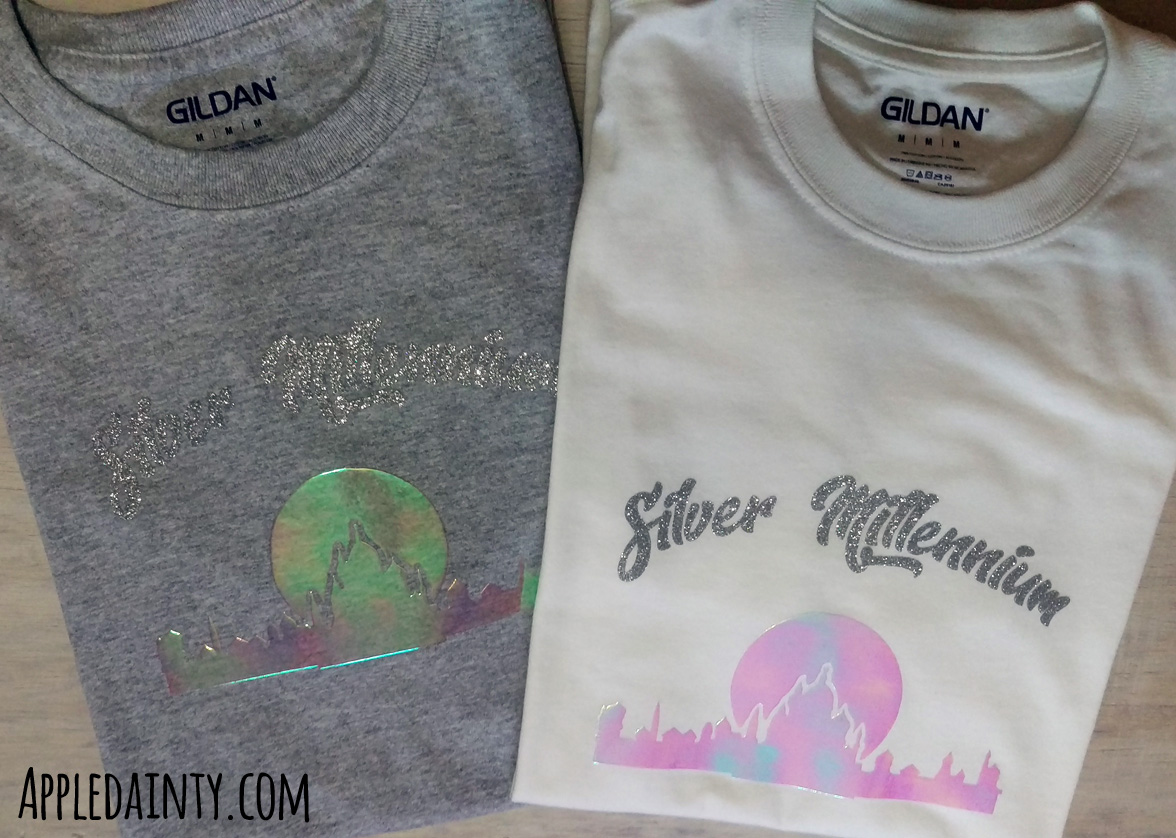
If, like me, you are a huge Sailor Moon fan and you like my shirt design, you can download the JPEG here to use with your own cutting machine. It is for personal use only; please do not redistribute or use my design for commercial purposes. Make sure to send me a picture or leave a comment on the blog if you use the design! I’d love to see your results.
While you can of course use whatever vinyl you have on hand, I bought my vinyl from HappyCrafters.ca (there is also a HappyCrafters.com for those in the US). I found that the local craft stores only sell vinyl by the roll, and it’s rather expensive. Happy Crafters sells by the sheet, which is a lot more convenient and cost effective for me. I should note that if you use my link to purchase vinyl, I get a small piece of the sale – but I would recommend then regardless because of their excellent product and service.
I’d also like to note that the font I used is called Dopestyle. It’s a great font; I purchased a limited commercial license so that I can distribute my design that uses the font free for you all. 🙂 If you like this font you can download it free for personal use here.
Anyhoo, that is all I’ve got for this week. I hope you check back again next week for more arts, crafts or cookery!

[…] then regardless because of their excellent product and service. I also bought the vinyl used for my Sailor Moon shirts from Happy […]